This rebuild on my 202 goes back to last August of 2010. My starter bit the dust in early August; so seeing the boating season was pretty much over for me; I began removing the rear sun deck and support structures. When I purchased the boat three years ago I knew much of the interior would have to be redone at some point. So, since I still had good weather the time was now. The pics below show just how poor condition the interior was in. I removed the sun deck lid; hatch opening; rear bench and box .......
...... rear panels that covered the battery compartment and the hydraulics for the power steering and trim.


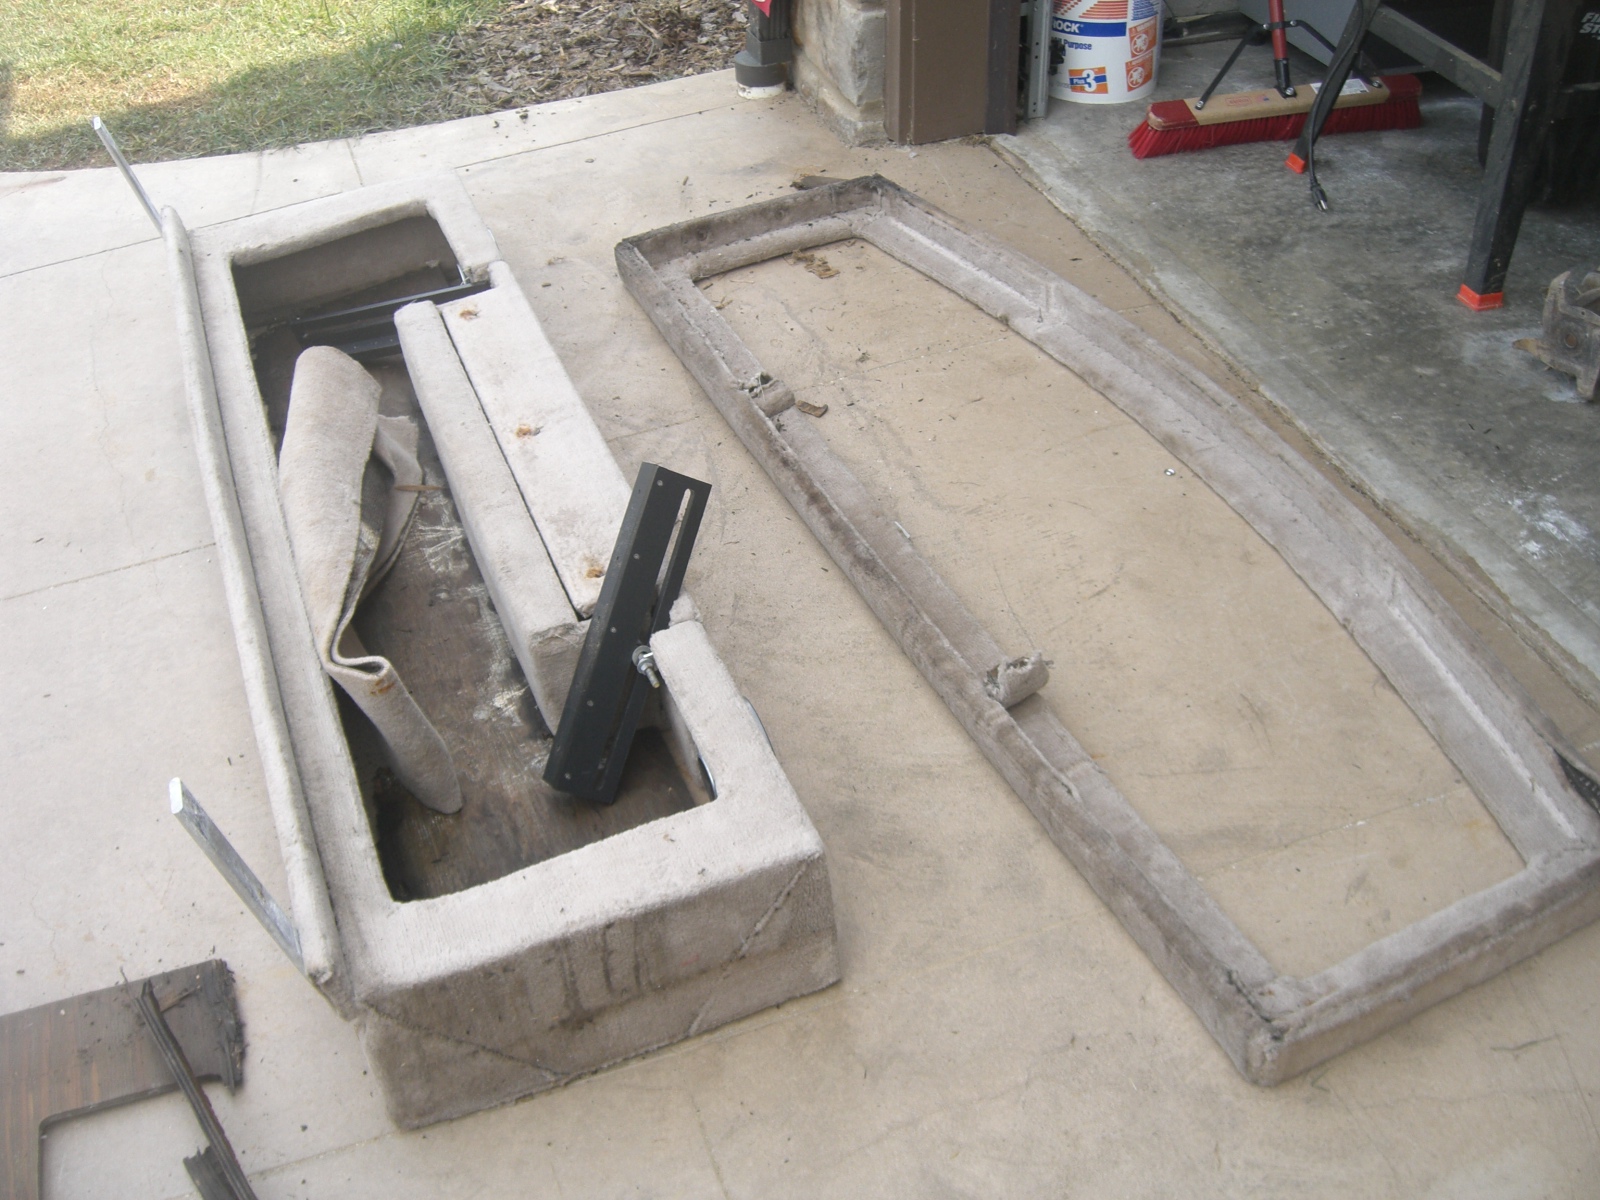
As well as the engine compartment box/walls. These act as the major support for the Sun deck and were in very poor shape. All structures were removed as carefully as possible so they remained intact. I would need them to create patterns later for all of the structures.

Once everything was cleared out I noted that the carpet was going to need replacing. I also found a soft spot in the floor port side; under the rear bench; right where the drill is laying in the pic.

This discovery was disappointing because I thought I had inspected the floor carefully before purchasing. What I didn't realize was that the 202 rear bench would flip forward; had I known I might have caught bad floor before purchasing. It would not have been a deal breaker; but I could have brought my purchase price down a bit. Next few pics show the rear compartment before a thorough cleaning.


Fast forward; May 2011. I didn't have much time to work on the 202 thru the winter and boating season is just around the corner. I need to get some engine work done and rebuild the sun deck. The floor and a complete interior redo will have to wait until after the summer is over. The crownie is hauled to Hendersonville for much needed engine work and I begin to create the patterns for the structures. I keep a good supply of cardboard around from past purchases of appliances and furniture. Patterns were easy because the plywood structures were mostly intact.

I placed them on the cardboard and traced around the edges with a sharpie......

....... and used a framing square to clean up portions that were missing.


Once all patterns were traced; they were cut out using a utility knife

All the Panels were made using 3/4" exterior grade plywood. And tools for the build included cordless drill; jig saw; Fein multi tool; framing square; table saw and miter saw.

Panels were cut and coated with a deck stain. I didn't want to put carpet back on the structures and I didn't have time to coat with a varnish or polyurethane, The stain will give enough water repelancy to get me thru the summer. The sun deck will come out again this winter for the floor replacement and at that time I will put a more protective barrier on them.

The hatch opening required a little more time and materials. I actually used the original hatch structure as my pattern and then made a tracing on a large section of cardboard so I would have a pattern after the old wood structures were discarded.


Once all the pieces of the the deck hatch opening were cut and ready for assembly; it was glued using PL Premium construction adhesive and fastened using trim screws.

Trim screws, in my opinion, hold better than staple type fasteners and I prefer them over most any other type.

I have spent a great deal of time talking up the great attributes of using PL in boat building and repair. Read thru my checkmate restoration for specs. Bottom line, its less expensive and holds better than 3M 5200 and I prefer it for structural applications. 3M 5200 comes in different colors and formulations; and I'll use them for exterior applications where the caulk lines show and where color is an issue.
Once the deck hatch opening was glued and assembled I sanded the rough edges using the Fein multitool. This has got to be the best power tool I have ever owned. I only wish I had purchased it when I started my checkmate resto; I would have been much further along than I am right now. I will go out on a limb and say no boat builder should be without it.

Once sanded, a coat of deck stain was applied and allowed to dry. The next few pics show the final structures installed. As most installations go; the pieces don't always fit as anticipated. This install was no exception. My sons and I put the structures in without fasteners; removed them for minor adjustments; and then fastened them in using all stainless hardware. The final pics show the sun deck installed.


Since all of the sun deck will be removed again this winter; I chose not to install the panels that cover the battery and hydraulics. So far the structure has held up well for this season and I don't anticipate any issues. This winter it will get a good coat of epoxy or varnish. I have decided not to cover it with carpet because the wood finish will match the plasi-teak flooring I'll be installing over the winter.


My next post will cover the rebuild of the 202's rear bench. I'll cover adhesives and fasteners in more detail at that time. Until then ...... Blue Skies!


A person who never required the services of a professional can ask others for some good recommendations. The best peoples to approach for such information are the ones that share a passion in sailing. There is a chance that they have had prior experience with the service providers as with best boat repair mechanic in all ways.
ReplyDeleteI admire the valuable information you offer in your articles. I will bookmark your site!!
ReplyDeleteAuto Glass Replacement
2000 Crownline 225 BR.How do I remove the engine walls on each side of the engine. No screws are visible.
ReplyDeleteNice Post Visit US
ReplyDeleteBuilding sun decks services in North vancouver