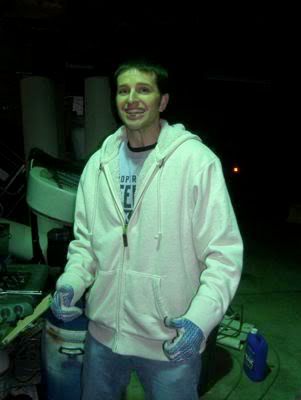
The following is the blog I started in 2008 chronicling the restoration of my 1983 Checkmate Enforcer. The blog originates in the Checkmate Owners Group Forum. Be warned, there are several bikini pics in the blog, because it was written for guys with fast boats and short attention spans. Sometimes we need a little help with pics so we can finish what we start.
Part 1: Lost the Enforcer but gained a trailer
Posted 01-12-2008 at 10:36 PM by Old Hickory
Updated 11-15-2008 at 02:13 PM by Old Hickory
My journey began with a trip to Houston to buy a 1983 Enforcer. I won't go into the details here but It can be found in my thread "Sad Checkmate Story" in Play to Win. The bottom line is I went to look at this boat.....
It appeared to be just what I was looking for. I knew it would need to have the stringers and transom replaced, but when I got to Houston the Enforcer had significant damage to the hull. I decided to back out of the deal but quickly realized I woudn't be able to negotiate the return of all my money.
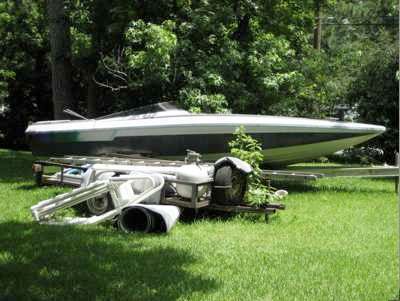
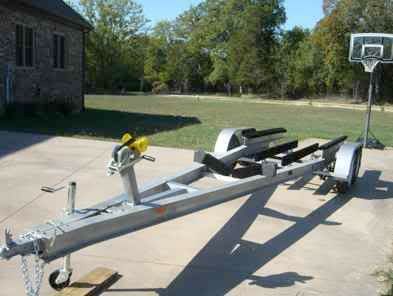
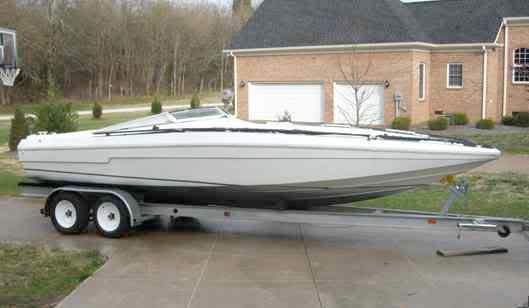
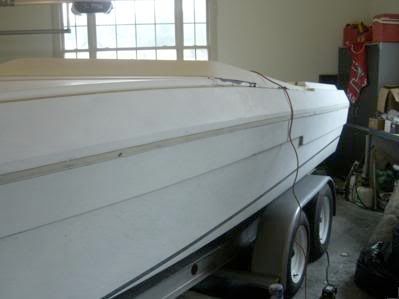
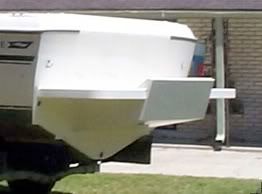
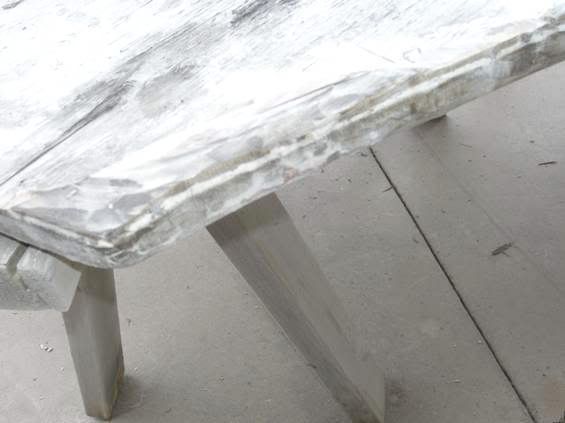
A new deal was struck; he kept the boat and I would keep the trailer. The boat was taken to the dump and I returned to Franklin with the trailer. As you can see from the pics the trailer was in pretty poor condition.
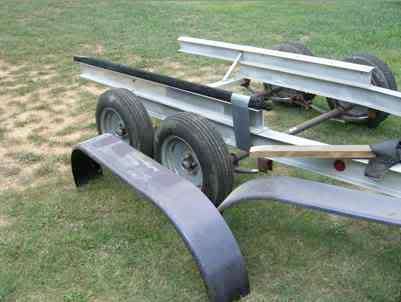

The tires and bearings were in good condition; but during the drive back the trailer literally began to fall apart. Bolts holding the aluminum bunks broke; so I had to use duct tape to hold it in place. At Texarkana I had trucker honk at me, pointing to my trailer. I looked into the rear view mirror and saw a aluminum I beam swing out in the other lane every time I hit a crack in the highway. The other bunk was missing the wood as well. I pulled over and taped the I beam down and found the missing bunk dragging by the old carpet about 3 feet behind the trailer.
The trip was a disaster; I lost the Enforcer(and money to boot) and my trailer was being strewn across the Texas/Arkansas state line.LOL I finally made it back to Franklin and began the process of rebuilding my trailer.
I painted the wheels....
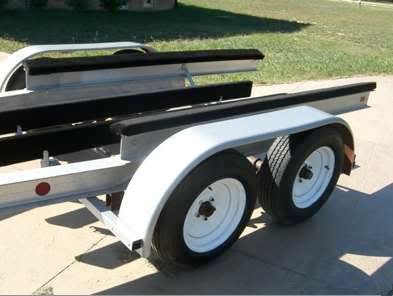
...and had a winch post mfg at a local weld shop. The bow contours on the Enforcer are very similar to a bass boat; so I copied a winch post from a trailer that had a 21ft Stratos sitting on it. You'll see later on it would be a perfect fit.
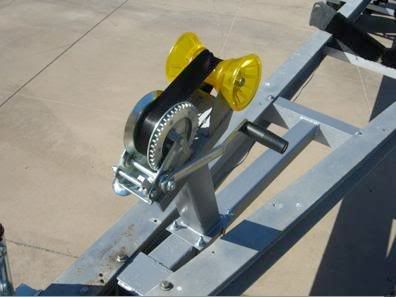
I had front fender mounts made and put 2 center bunks in....
...and had rear mounts mfg at the same weld shop. Also put new running and tail lights.
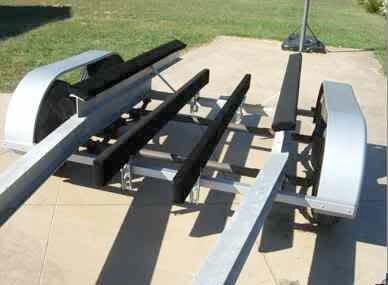
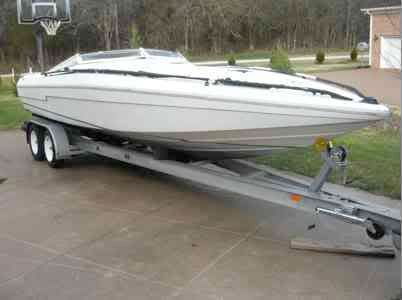
So now the fenders have been painted and mounted; winch and post added; new running and tail lights; 2 extra bunks; new carpet; running and tail lights; all stainless bolts; and wheels painted. It cost me about $250.
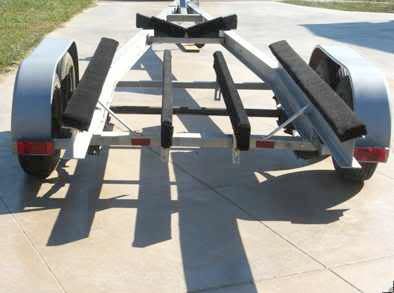
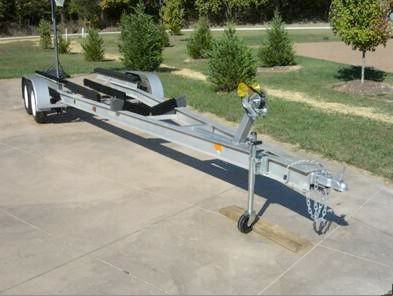
The trailer was a complete transformation; and here is what I have now.....
You're probably asking; "Why is he talking about his trailer? I thought this was about the Enforcer?" Well...it is. This experience was disapointing to say the least; but once I finally got my Enforcer I was so glad I had this trailer. It turned out to be perfect for the boat.
I'll be covering that and my experience with Kip Combs and Checkmate in Part 2: Yahoo! finally bagged a Enforcer. A truly gratifying experience!
Some of you may be thinking about my comment a few days ago in BOTM regarding checkmates on trailers.
You know: "looking at checkmates on trailers is kinda like looking at beatiful women in grannie panties...they're nice, but...." And now here I am blogging about nothing but trailers. That's like just lookin at the panties! geeez! LOL
No worries, here's some eye candy to make up for it. I'll be tossing these in every now and then just to break the monotony of the resto. Enjoy!
Hick


Part 2: Yahoo! Finally bagged an Enforcer.
Posted 01-13-2008 at 11:33 PM by Old Hickory
After having a disappointing experience with my first attempt at finding a solid Enforcer; it managed to have a silver lining. A good trailer.
But having a good trailer and no boat was a real bummer. So after looking for several weeks I recalled a thread where Boatman4021 had found Kip Combs an old Enforcer so that a mold could be made for the Pulsare 2400. I emailed Kip to inquire about it; he said it wasn't available; but, he had a 83 enforcer sitting at the plant and thought the owner might be willing to sell.
Long and short of it; I was able to purchase it. Kip and the owner were fantastic through the whole process. We had only one minor snafu....I spelled the owners name wrong on the cashiers check. Ouch!
Here I was in Bucyrus Ohio, getting ready to hook up the Enforcer, and I had a useless check. All worked out well. Kip, the owner and myself worked out a deal over the phone, where I could take the boat back to Franklin and then I would overnight a check to the owner in Florida. Kip then sent me the title once the owner confirmed reciept. These guys were great. It's good to know ther are people like this out there; because it makes the missteps in life a little easier to bear.
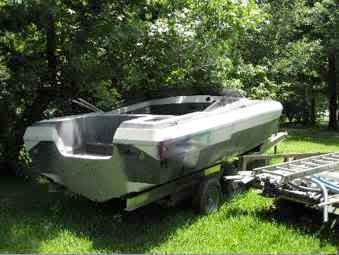
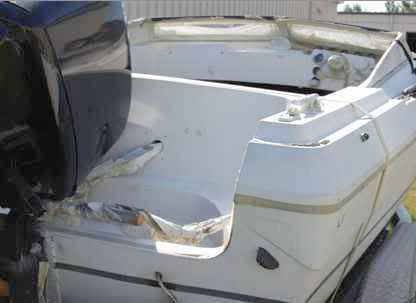
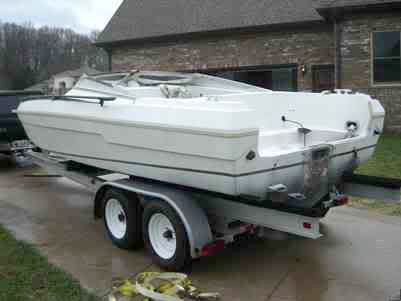
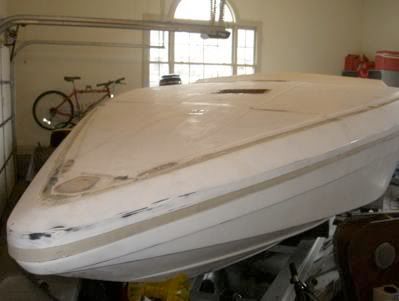
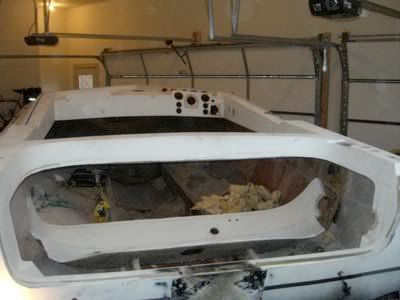
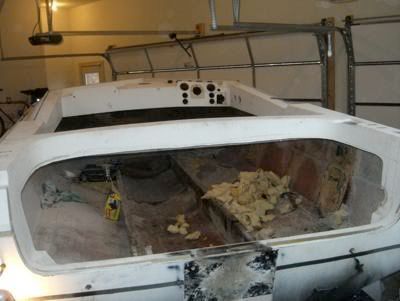
So, here is the Enforcer as it sat at the Checkmate facility.

You can see the floor is partially removed. In fact, it had been pulled up pretty much from the transom to the cabin. The owner had attempted a resto down in florida and the guys he hired pretty much botched the job. He said he was devastated because he had owned this boat since it was new. I'll get into those details a little later on.
Now you notice the boat is on a trailer and has an outboard sitting on it. This where Kip really came through. He helped me broker this deal so I only had to buy the boat and trailer. He even held the deal up for a few weeks to see if I could sell the trailer I had restored.
Couldn't sell it because I had far too much money in it. So I bit the bullet and decided to buy the boat and trailer; hoping I could sell one or the other later. Turns out that was a good move.
A guy called me the week before I was to pick up the Enforcer; and wanted to know if my trailer was still for sell. I had reduced my asking price on craigslist a few days earlier.
He came out to look at my trailer and took measurements. It became clear that mine was too narrow. He was going to put a 24 ft SeaRay cabin cruiser on it and needed it a little a wider. I knew the Enforcer would sit on this one fine, but also knew the trailer in Bucyrus was much wider. I made him a deal and he agreed to buy the one up in Ohio. That was only after his wife slugged him the arm.
Seems he was skeptical because I was selling him a trailer that was better than the one he was looking at. He looked at me out of the corner of his eye and wanted to know why I was selling him a newer trailer; with brakes and title for the same price. I told him I didn't care which trailer I had because I knew either one would work for me. His wife then slugged him in the arm and said "Honey, the man has two trailers and needs to get rid of one of them". The light bulb came on and he smiled; he stuck out his hand and we shook on the deal. He came over and got the trailer the same day I got back. Man, the Lord works in mysterious ways! Thank God for perceptive wives, they know what you need even when you don't.
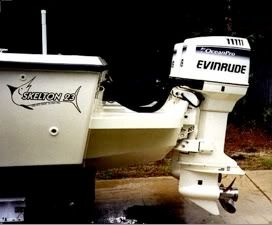
Here is my Enforcer sitting on my refurbed trailer.
We made the switch out at Percy J Priest lake here in Nashville. I held my breath just a little when I launched the old Enforcer into the water....guess what? She floats! LOL I think the trailer and boat combo look really good. Even better once I paint the fenders and mounts to match the boat. The guy who bought my other trailer agreed. He thought my boat and trailer combo almost seemed made for each other.
All in all things worked out well. Trick is not to get discouraged. Look for part 3 in about a week. I'll be posting pics of the start of my resto.

Part 3: My Enforcers little strip tease!
Posted 01-28-2008 at 01:17 AM by Old Hickory
Updated 01-29-2008 at 12:45 AM by Old Hickory
Oh Lordy have mercy! If there was ever a better title I do not know what it would be! I have come up with another pet peve; " dumb asses who don't use stainless nuts on stainless bolts....yadda...yadda...yadda!" Man....what, a frustrating ordeal. I simply can't fathom why anyone wouldn't use stainless nuts and bolts on stainless hardware jeeeeeez! even without salt water, you are still going to get corrosion; give someone or yourself (15-20 years down the road) a break!
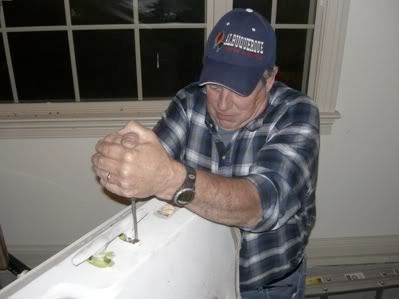
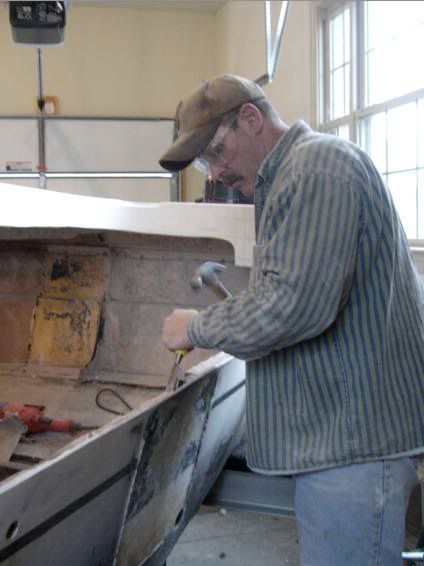
My father-in-law, Doyle, came in for a visit last week and it couldn't have more perfect timing. I had done about all the stuff I could do by myself as far as removing fixtures and hardware. Now, it was time for the two man jobs. I was getting frustrated because so much of the hardware was a mix master of stainless and non-stainless. There was no rhyme or reason to it. And most just wouldn't come off without the help of someone securing it from the topside. So much, was so corroded, that it either crumbled, or no wrench would fit it.
Doyle and I set out to getting all the hardware and windshield removed from the boat. Here are a couple of pics with Doyle on the topside while I was underneath with either a pair of vise grips or socket wrench.....
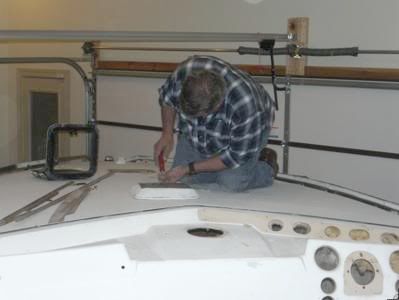
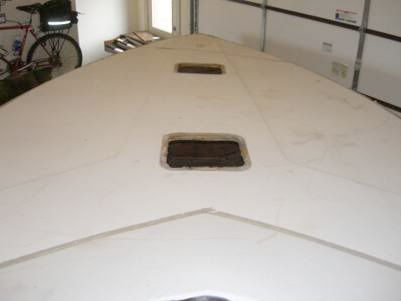
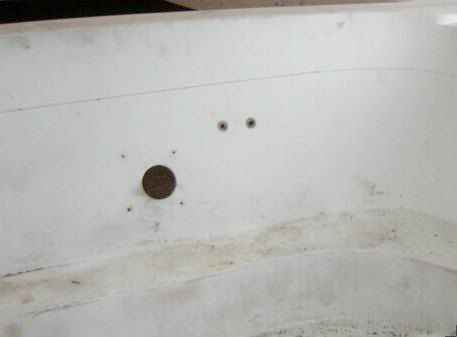
We got most of the hardware off the top and still had the bolts to the hand rail and running lights on the bow to go. I tried to crawl through the hatch leading to the front bulk head but it was too small for my big butt to get through.LOL
So I enlarged it by scribing two inches around the circumference;then used my jig saw to cut it out. It wasn't perfect, but I could at least crawl through and get to the front bulkhead nuts and bolts.
All the harware was removed except for the front and rear eyes. They will have to be ground off. The hardware was stainless; but the nuts weren't @#$!&*^!!!! can't even get a pair of vise grips on the bastards! Oh well, thats the way it goes I guess LOL.
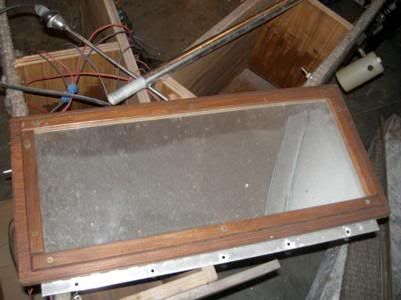
Here's a few pics of what she looks like before and after the windshield and hand rails were removed.
Before......
After.....
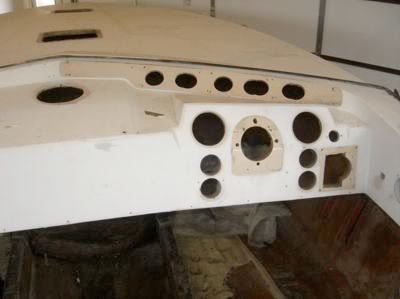
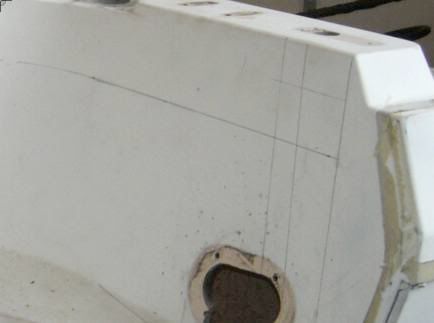
I have alot of holes on the dash to fill; I'm going to have to decide fairly soon as to what I will be needing; to monitor my boat.
Well thats about it for now now. next week I'll post the complete floor and stringer removal; and the parts and pieces I plan on saving and discarding. thanks for looking!


Part 4: Salvaging what I want; pitching what I don't
Posted 02-25-2008 at 11:22 PM by Old Hickory
Updated 02-26-2008 at 12:13 AM by Old Hickory
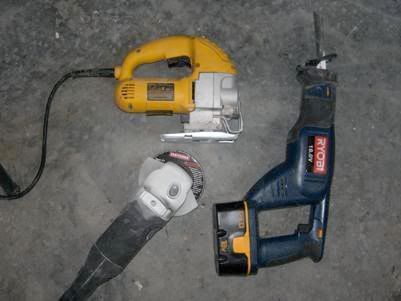
Although I didn't mention it in Part 3 I thought I would post a pic of the various tools I used to remove foam and disassemble the hardware and electronics from the ol' Enforcer.
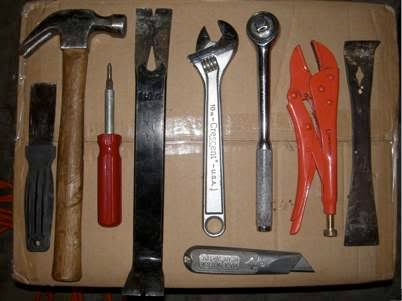
The tool to the far right is kind of interesting; it's a bee hive scraper! Makes a dandy little foam remover! Doyle left it with me when we installed the hardwood floors in my new house a couple of years ago. He said he didn't need it anymore since he quit keeping bees about ten years ago. I also used various sockets; screw drivers; cordless drill and a pair of wire cutters that I didn't picture.
After stripping the Enforcer inside and out I began the task of deciding what I want to keep and what I need to pitch or sell. Here are a few things I plan on keeping.
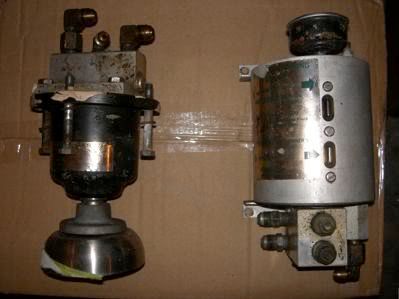
The power steering looks to be in good shape; I'll need to replace the hoses and fittings. I'll also need to get a cylinder that can accomodate twin engines.
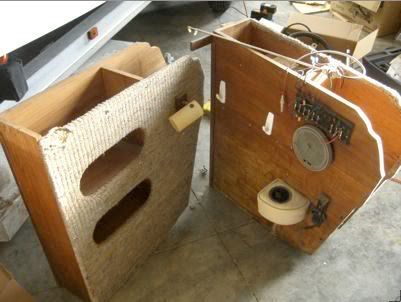
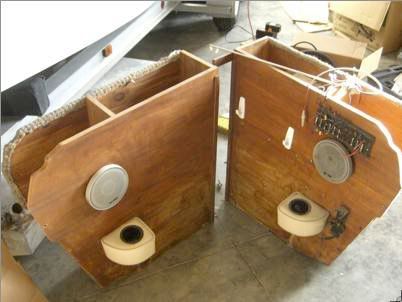
The dividers that separated the cockpit from the cabin appear to be in pretty good shape; although on closer examination they will need to be rebuilt; the ply has begun to delaminate and they are cut up from the previous radio and speaker installation. I'll use them for patterns.
I'll probably try to use the mirrored hatch to the front bulkhead. It is in excellent shape.
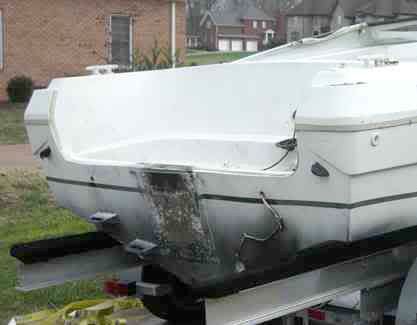
I'm also going to try to salvage the gas tank. It has some surface corrosion and needs to have a hole patched.
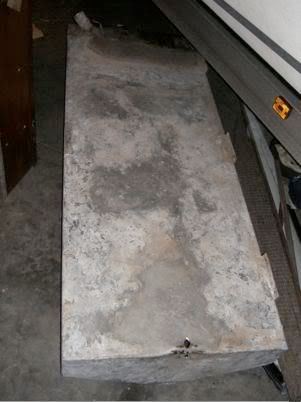
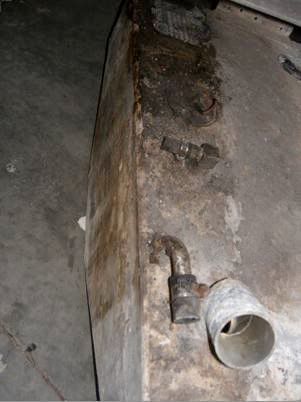

This is part of the botched resto I spoke of earlier. I'm not sure how or why the guys put this hole in the tank. The best I can figure is they drilled the holes and then looped a rope thru them and yanked the tank out. That would explain the deformity on the edge. Just makes you shake your head in disbelief.
I am not going to use the gauges; steering wheel and compass. The compass is in pretty good shape I'll probably put it on ebay.
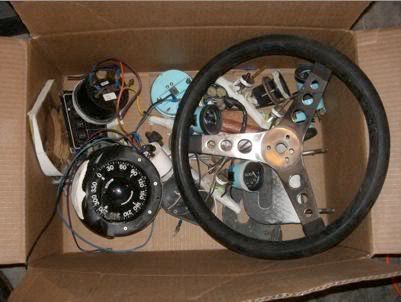
I also will not be reinstalling the rails; windshield and other hardware. I intend on using flush mount when I can; as well as anodized bezels, gas cap, hand rail etc. I am going to keep the Enforcer as streamlined as I possibly can.
Well thats all I have for now; I'm sipping on three fingers of sailor jerry and having trouble finding the keys:cheers
I've done alot of work on the transom; I'll be posting that soon.
Hick

Part 5: Loosin' the caboose!
Posted 02-26-2008 at 10:35 AM by Old Hickory
Updated 05-22-2008 at 05:01 AM by Old Hickory
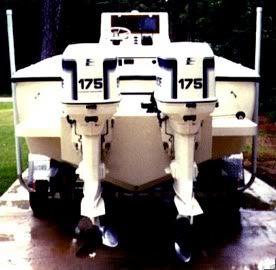
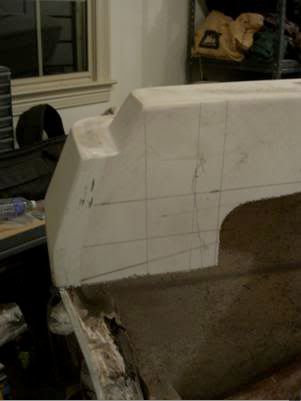
I finally took a deep breath and commenced to removing the splashwell of the enforcer. This was by far, the most difficult decision I have made too date. I have tossed and turned for weeks thinking about how I should rebuild it; only to change my mind again once I began cutting it out! LOL. The end result is hopefully a transom that will both cosmetically enhance my enforcer; and also provide a sturdy base for a transom extension that will hold twin mariner 175's. Here are some example pics.
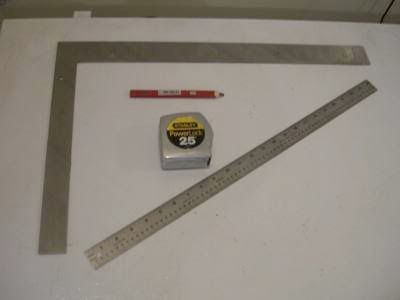
To begin, I established reference points by drawing both horizontal and perpindicular lines within the splashwell. To accomplish this I used a framing square; carpenters square(not pictured); flexible metal rule; tape measure; and carpenters pencil.
I established the horizontal line by setting the framing square on the bottom back ledge of the splashwell and measuring up 10". I did this every 4" all along the back of the splashwell. I then connected the dots using the carpenters pencil and flexible metal rule. The rule was invaluable in making the curve of the splashwell. This gave me about 8" from the top down; plenty of room to build a lip that the deck hatch will rest on.
I also drew perpendicular lines along the rear sides of the splashwell so I could begin to visualize how deep I wanted to make the shallower well.
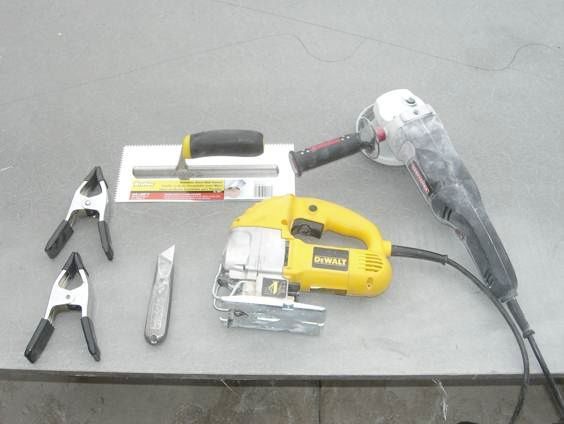
Once I had determined the dimensions of the new splashwell I decided to cut the well out. These are the tools I used for the job.
I gave myself plenty of room by cutting outside my lines just in case I changed my mind or needed to make adjustments. Which I did.
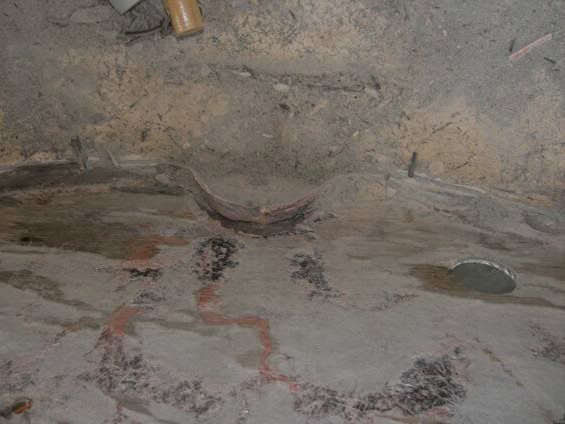
You can see from the pics that I left the lip and the sides next to the transom intact. This is where I changed my mind and made a adjustment. Instead of making a shallow splashwell I decided to remove the well alltogether. I felt the transom needed to be as full as possible to support the weight of the transom extension and twin engines. So....
I removed the sides of the well....

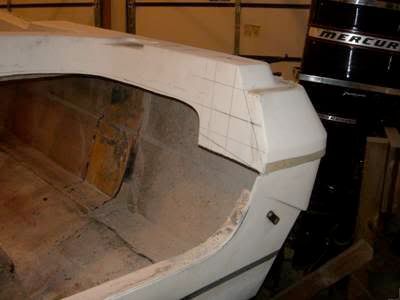
....and the lip. The transom will now run all the way to the top(I'll use 4 layers of 3/4 ply)(UPDATE: I decided to use Coosa Board for the transom; two layers of 3/4" B-26 and one layer of 1/2" B-20 for an internal thickness of 2"....thanks jallen355 for turning me on to this stuff ) which will make the stearn of the enforcer almost bullet proof and will also give me a larger rear sun deck.
) which will make the stearn of the enforcer almost bullet proof and will also give me a larger rear sun deck.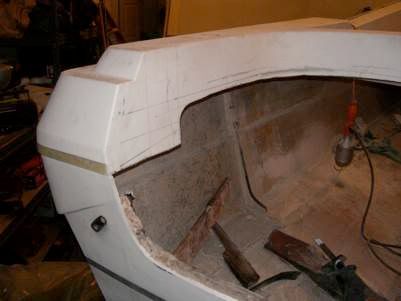
Here's the view from the inside. You can see I have a portion of the stringers and the transom knees removed. By having a full transom, I can now run my knees to the top making it even stronger.
Well thats it for now. I'm getting ready to tackle the transom removal this afternoon. Thanks for looking!
Hick


Comments

Total Comments 4

Project
Great looking work. I haven't forgotten about your question about twin engines just can't find anyone with a formula to plug in. General thought is you should be able to go up at least 2' of pitch and still turn the same RPM. 2", say from 21 to 23 is about 6 mph more. It'll be interesting. Shame you're not closer cause I have 8 different SS props, but of course don't have 2 of the same.Luv your girls.
Art
If it's slow it must be an OMC.


 Thanks Art; I would sure like to get this project done sometime this summer; not hopeful it will happen. If you do find something that will help in propping twin engines I'm all ears. I appreciate your willingness to givie it some attention.
Hick
 Hey Hick either you completly nuts or you got some vision like I do. Takes a huge set to cut the rear of a boat apart like you did! One of the things I dont like about outboards is the loss of the rear sun deck because of the well. Great ideal and good luck on the project, you know I will be watching your posts for updates
yellowfiero88,
Thanks for the encouragement. That was the most nerve racking thing I had done in a while. I will say it should be sweet when it's completed. I just posted parts 9 and 10...you'll see how it's shaping up. thanks again.
Hick


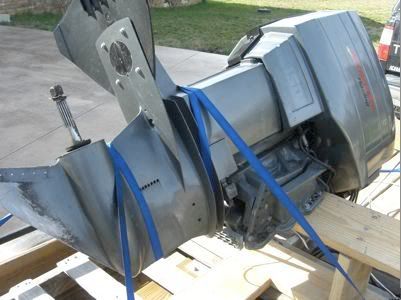
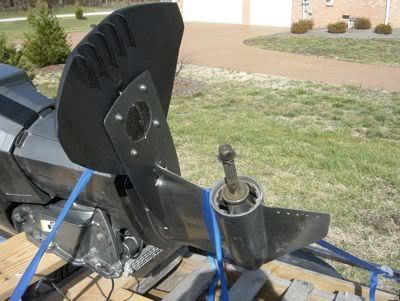
Part 6: Road Trip.....to get my Mariner 175
Posted 03-03-2008 at 03:33 PM by Old Hickory
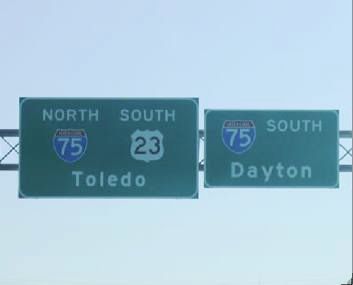
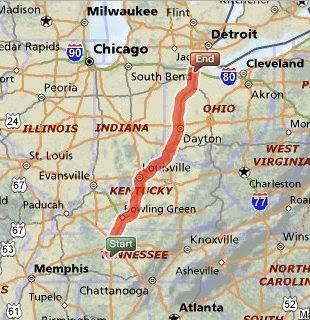
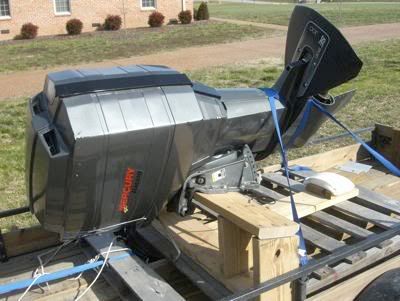
Thats right... Toledo Ohio! 991 miles round trip to get my Mariner. I had agreed to purchase the motor back in January from blkz28(aka; Luke); but was unable to make the drive until this past Friday. Luke was kind enough to keep the motor for me untill I could work my schedule out.
I left at 0900 friday morning and expected to be in Toledo around 1600, but I didn't anticipate the time change to eastern time. That threw me off by an hour and was also set back by traffic in Dayton. Finally pulled into Lukes neck of the woods around 1830.
zstevens(aka zach) was gracious enough to take some time and meet us at Lukes place to help get the Mariner loaded on to my trailer.
Once I arrived I met Luke for the first time...

....his friend Keith; who helped load the motor....

...and Zach....who also by the way helped me negotiate the last few miles of Toledo via cell phone.....
.....
These guys were great. Didn't take but a few minutes to load the M175; I had made a stand for the motor out of a pallet, but had forgotten to bring a drill and some lag bolts for mounting. Luke had me covered; he and Keith had it mounted to the pallet in no time.
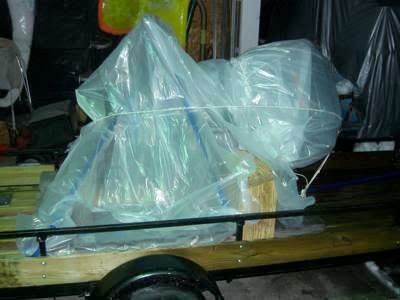
I forgot to take some pics while we were getting the motor on the trailer(I was freezing my butt off; while these guys were in t-shirts LOL.) I did get some afterwards with it covered in plastic.
After getting the motor loaded; Zach and I went to eat at Frickers...

here's a pic of some of the waitresses....

It's similar to Hooters.... but without the...

.....Hooters Man I love livin' in Dixie!
Man I love livin' in Dixie!The food was very good and I couldn't eat all of it. Had to carry some of it home.(my boys made quick work of it once I got back) Zach and I hoisted a couple of Bud's:cheers; and then noticed there was snow coming down. I figured I needed to get on the road. After Zach gave me some directions on how to get out of Toledo I hit the road.
Got a few miles down US 23 and literally saw two cars slide off the road in front of me The morons were going way too fast for the conditions and as they zipped by me, they must have seen the blue flashing lights from a cop up ahead; both hit their breaks; and bam! into the ditch.
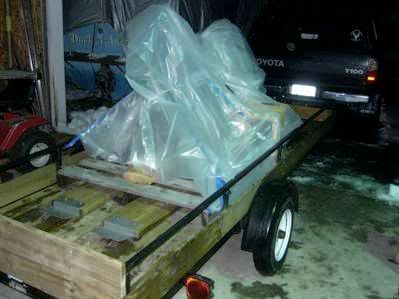
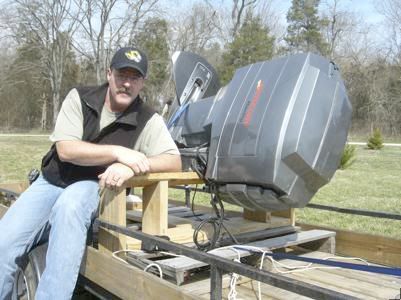
The morons were going way too fast for the conditions and as they zipped by me, they must have seen the blue flashing lights from a cop up ahead; both hit their breaks; and bam! into the ditch.I made the next exit and found a Baymont Inn and decided to spend the night. Turned out to be a good move. Got up the next morning by 0600 to much better road conditions and had no trouble making it back to Franklin. Made the trip back in just under 8 hrs. here's a few pics of me and the motor after I got back on saturday.
The trip went very well; I was glad to finally meet some of the folks on the forum...first rate all the way. My thanks to Luke; Zach; and Keith for all your help and tremendous hospitality.
Well thats it for now, I'll be posting on my progress with the transom removal sometime this week. Enjoy the pics!
Hick


Part 7: Transom removal
Posted 06-02-2008 at 11:45 PM by Old Hickory
Updated 06-03-2008 at 12:02 AM by Old Hickory
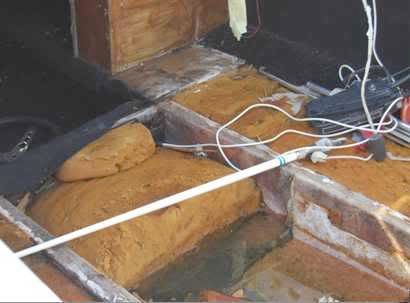
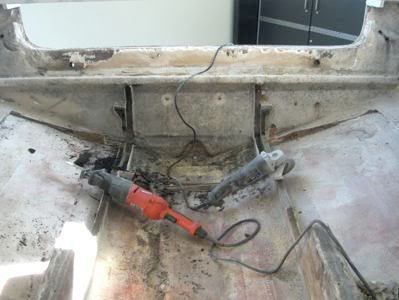
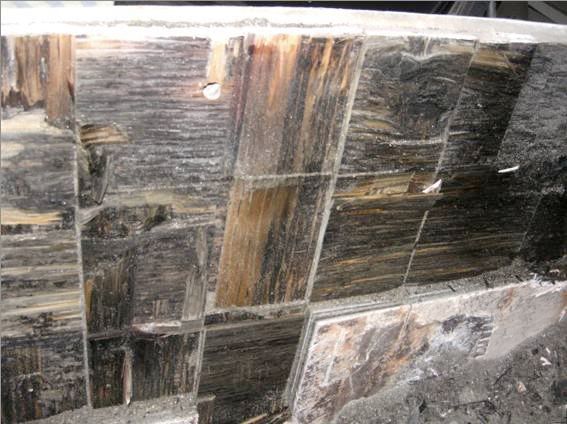
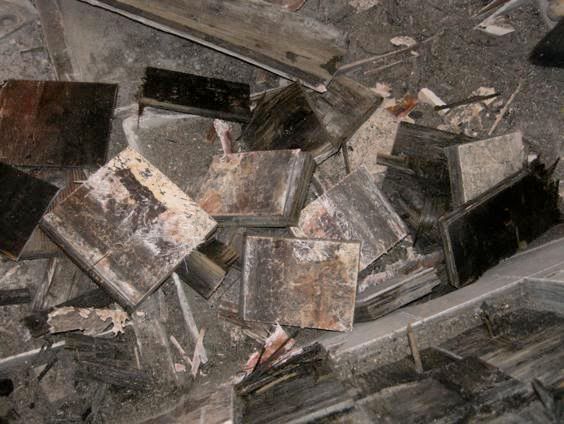
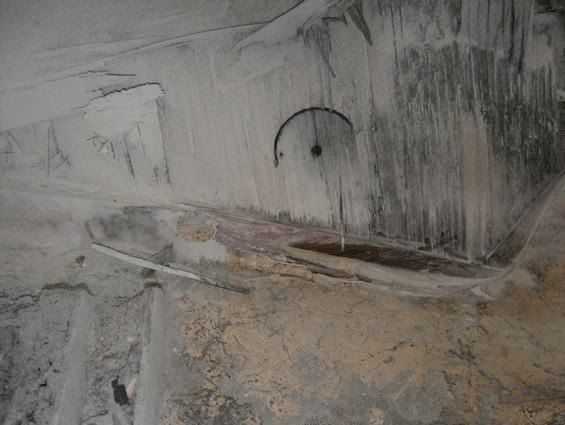
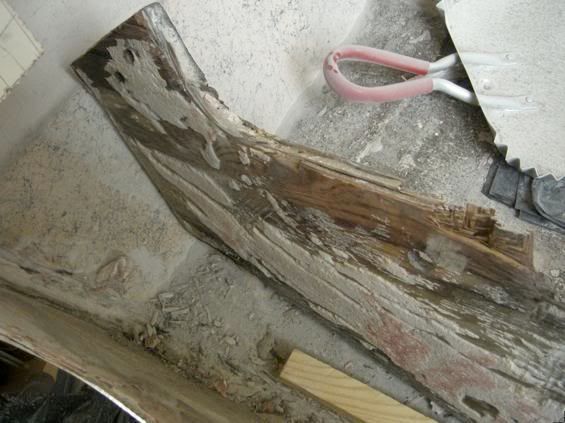
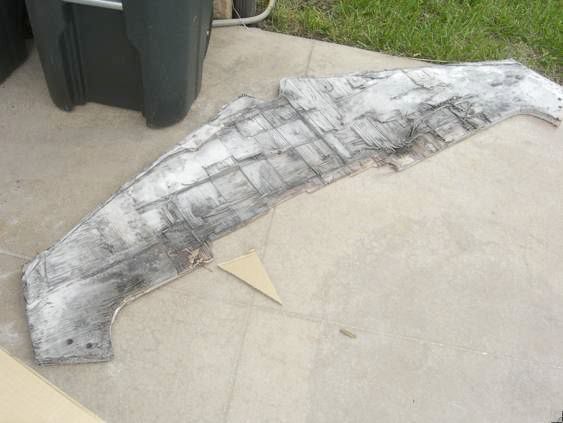
Well, it's been awhile but I've actually moved along; I tackled the the gritty job of removing the transom. This first pic is of a core I removed early on which told me right away that the transom would have to come out.
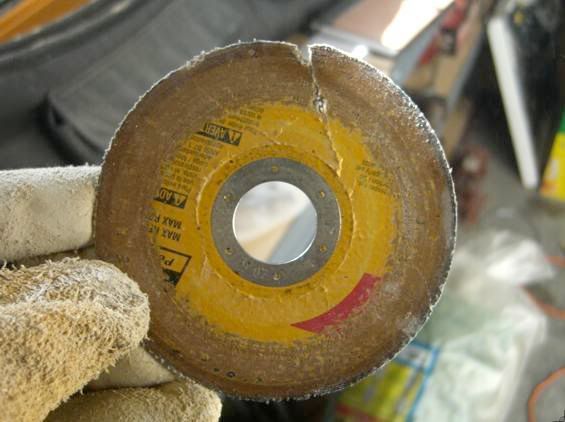
I started first by trying to select the right cutting tools. The first was a metal cuting blade for my grinder.
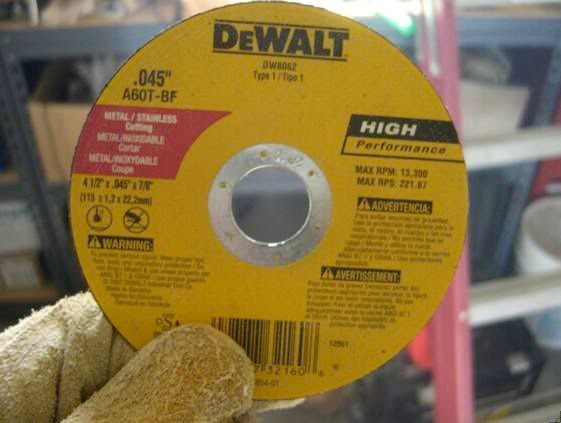
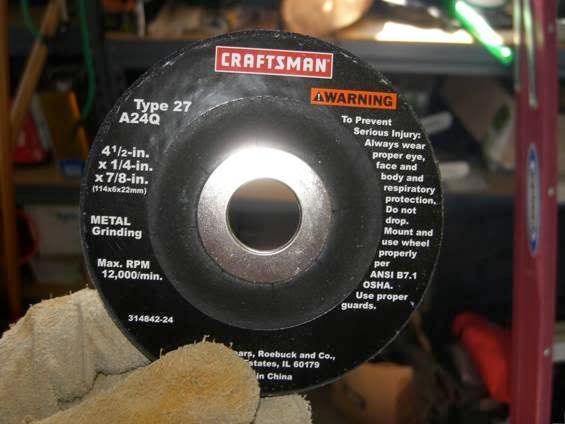
The second is a metal grinding wheel; this has turned out to be an excellent choice. It does alot of things well.
I started by first cutting a checkerboard pattern thru the glass and into the first layer of wood.
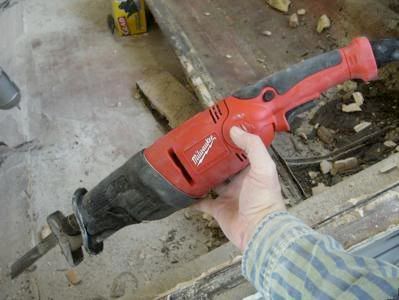
This turned out fatefull for my cutting blade; it started coming apart pretty quickly. I then turned to my circular saw which worked much better.
I then began using a 2" wood chisel and hammer; and as you can see from the next few pics it was coming out nicely.
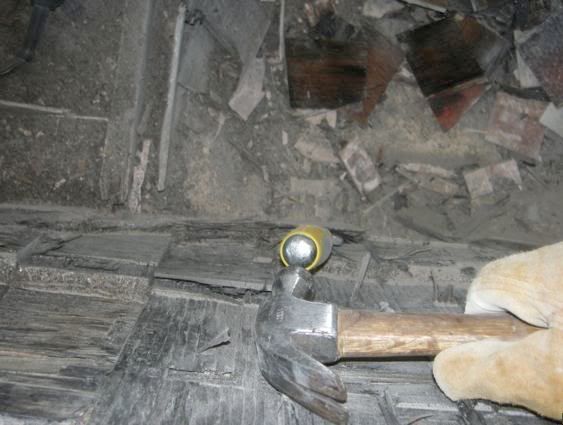
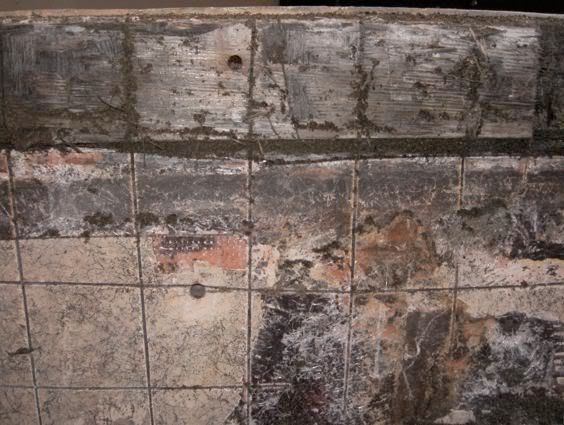
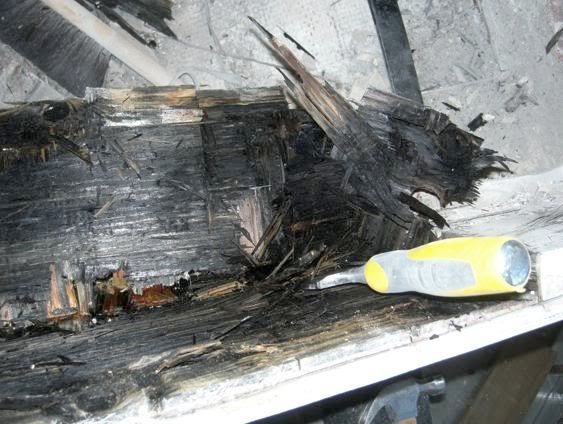
It was at this point I hit a couple of snags. First, checkmate used alot staples to hold the wood together while it was setting from the glue. These played havoc with my chisel. Three or four wacks and the edge looked like a tennessee hillbilly grin. The metal grinding blade started becoming very useful; it sharpens a wood chisel pretty darn quick.
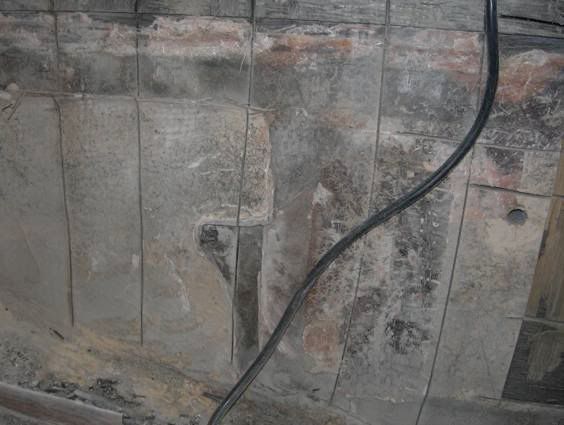
Second, the center layers of wood were more saturated with water and it was like trying to cut rubber with a chisel that wouldn't stay sharp. The next pic demonstrates what I mean.
I was making very slow progress at this point and frustration was setting in. Thank goodness for spring sports and the pinewood derby. Saturdays were pretty much taken up by three boys playing soccer and flag footbal; and also trying to help all three of them build their derby cars. While looking at a wedge shaped car I got the idea that I might be able to wedge the transom away from the outer skin.
Several weeks went by and I went out to inspect where I had left off. The wood had dried considerably and I noticed there was some seperation starting to take place between the skin and the wood from the transom. It would be a couple of more weeks before I could put my idea to the test.
D-Day
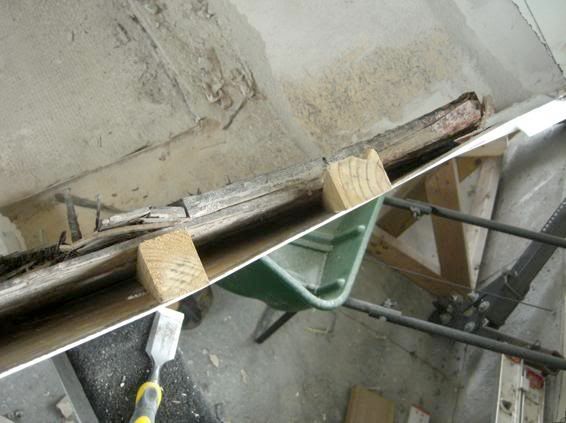
Well now it's time to impliment my brainstorm. I first cut seven wedges; four that came to fine points about 12" long and three that had blunt ends about 18" long.
I drove the thinner wedges in first being careful not to drive them too quickly. I didn't want to run the risk of cracking the outer skin. Some of these pics are out of order, but you'll get the idea.
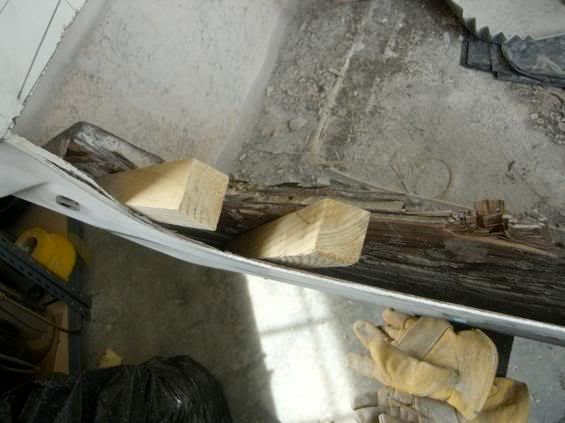
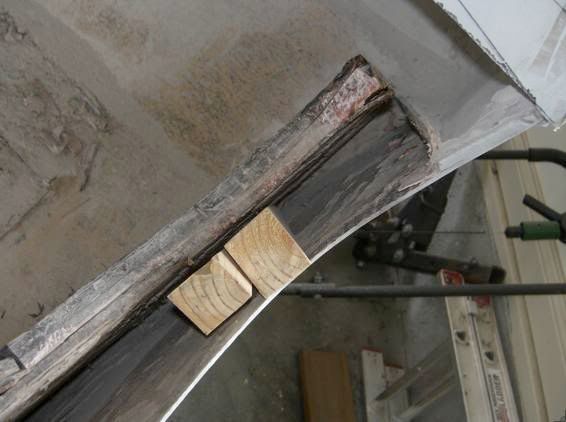
These went in on the right and left sides. I then started a larger wedge in the middle.
It was amazing; you could hear the wood separating from the glass; once the cracking and poping slowed I would begin driving a little further. I then began to realize that I hadn't gotten all the glass away from the bottom and sides of the transom. So I took my grinder and ground the glass all the way around the inside perimeter of the transom; down to the wood.
Once that was accomplished the wood should seperate easily the further I drove the wedges. I began two more large wedges on the right and left sides.
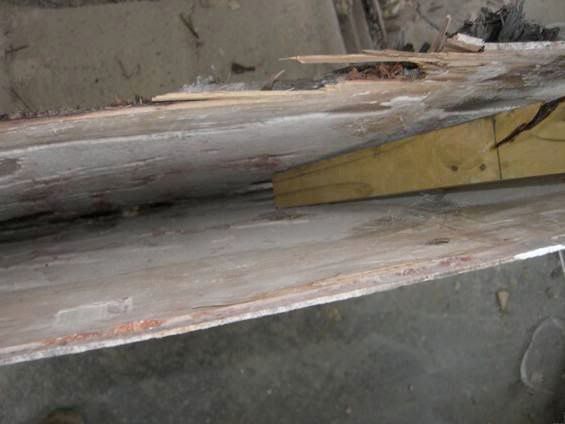
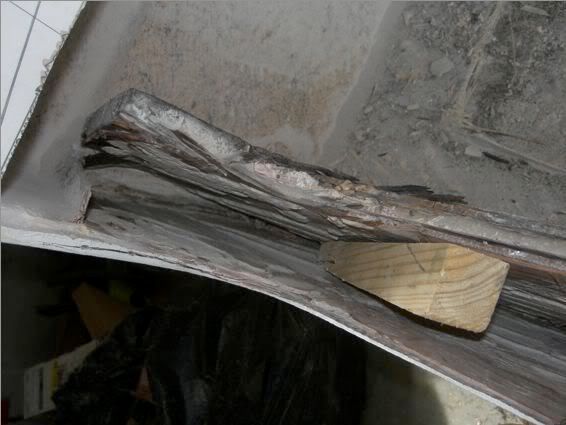
I finally had what appeared to be good seperation. I waited untill I couldn't hear any more crackling and gave the wood a good shove. She popped right out!

Here's a couple of more pic's

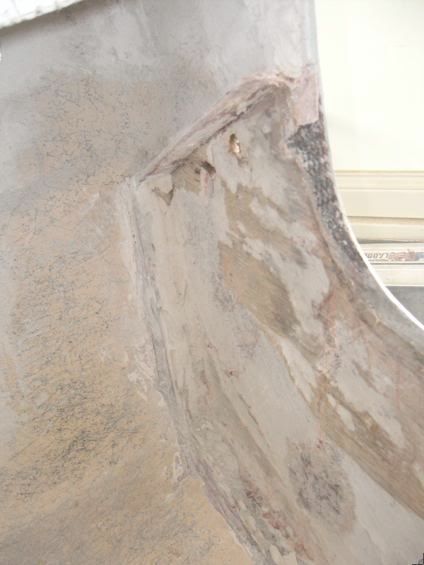
Now the transom is out, thank goodness, and is ready for grinding and replacing.
I'll be posting the the cutting and glueing of my replacement transom soon. Thanks for looking.
Hick

Part 8: Building the transom
Posted 06-03-2008 at 11:34 PM by Old Hickory
Updated 06-05-2008 at 01:06 AM by Old Hickory
Finally getting around to building the first structural parts to my Enforcer. Once the transom was out it was on to making a pattern from the old one; cutting and glueing it all up.
First decision I had to make was to determine what materials I was going to use. I initially was going to build the transom out of Douglas fir due to it's strength and cost effectiveness; but was eventually swayed by several members, one in particular, to give Coosa board a try. The one draw back was cost.
Coosa board is manufactured by Coosa Composites LLC, in Pelham, AL. It is a high density polyurethane foam, reinforced with layers of woven roving and continuous strand fiberglass. Their Bluewater series panels come in 2 different densities. B-26 has their highest strength to weight ratio with a density of 26lbs/sqft and is 30% lighter than plywood.
B-20 has a density of 20lbs/sqft and is 45% lighter than plywood. This from Coosa's website.
As I mentioned earlier, it is expensive. Cost comparison to plywood is as follows:
B-26 3/4" 4'x8' panel $195
B-26 1/2" 4'x8' panel $183
B-20 1/2" 4'x8' panel $129
(Advanced Plastics; Nashville, Tn.)
DFir 3/4" 4'x8' panel $71
DFir 1/2" 4'x8' panel $58
(Nashville Plywood Inc.)
Once I got over the initial sticker shock and found some additional structural products that were actually cheaper than ply,(I'll cover that in a later thread when I get to stringer and floor replacement), the over all cost would not be too much different than ply.
So now I have purchased the Coosa and I am ready to begin the process of making a pattern from my old transom. Here are the tools I used for this part of the rebuild.
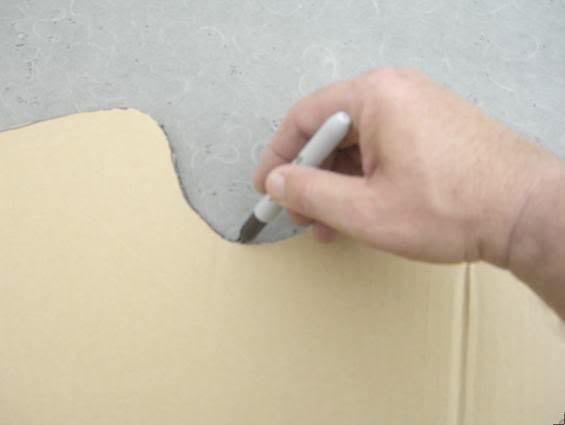
First I ground the bondo off the old transom so that tracing would be more accurate.
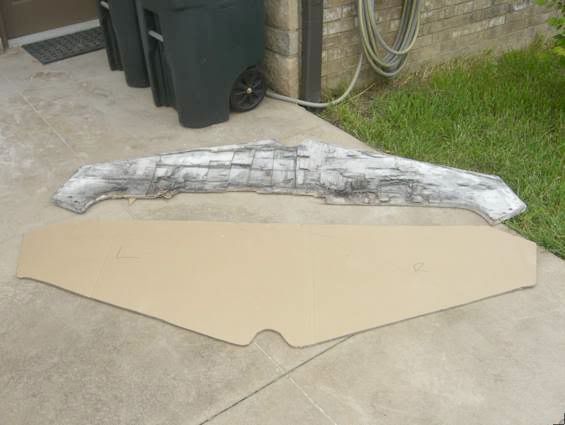
I made the pattern by tracing the old transom onto a large piece of cardboard from a refrigerator box and then cutting it out with a utility knife.
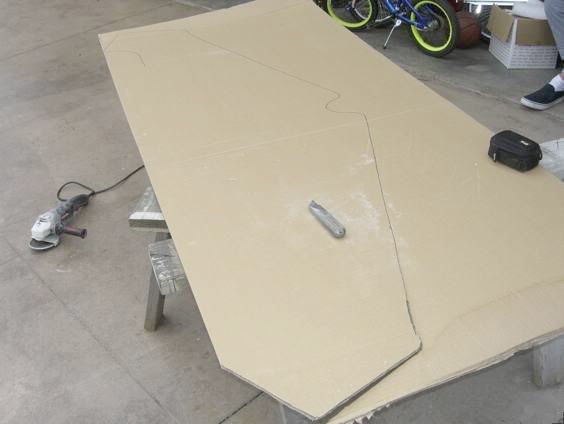
Doyle watching me cut the pattern
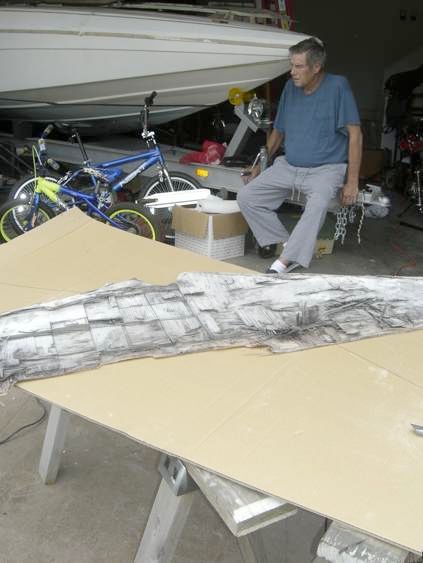
Couple of pics of the finished pattern
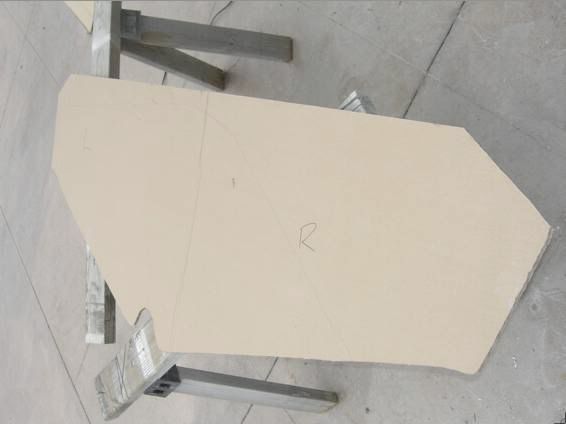
You may have noticed that I do not have the engine cut out for the splashwell. I have eliminated it and will be building the transom ala convincor style.
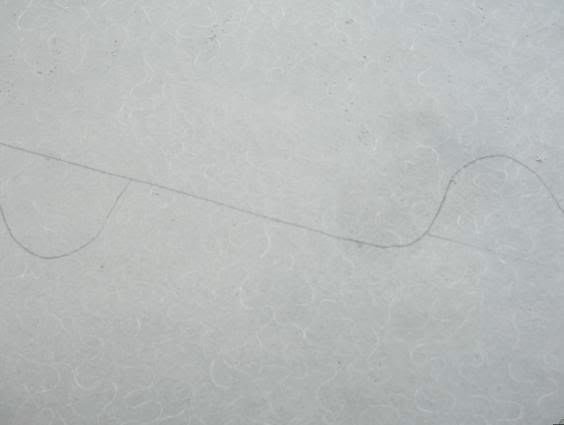
Next I began tracing the pattern on the coosa using clamps and a sharpie. You may notice in several of the pics of the pattern I marked "R" and "L". The original wood transom wasn't completly uniform from right to left. So I marked the pattern and my coosa panels to be sure the glued panels would be consistent.

I was able to get two pieces of my transom off of one B-26 panel; however there was a small area of overlap.
You'll see how I address this later.
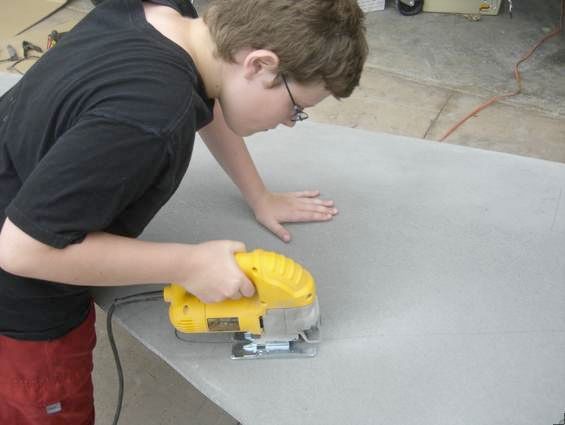
Now to cutting; this stuff cuts like butter! I fired up my jigsaw, took a deep breath, and began...
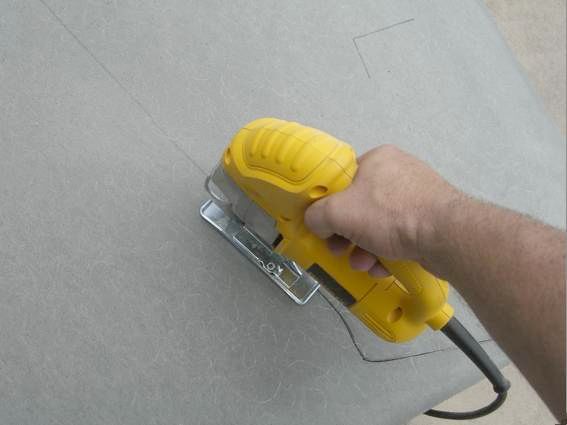
Now many of you know that when you're doing the hot nasty stuff, the kids are nowhere to be found. But as soon as the power tools are out they are all eager to help.
Here's a few pics of two of my boys helping me "cut the coosa"
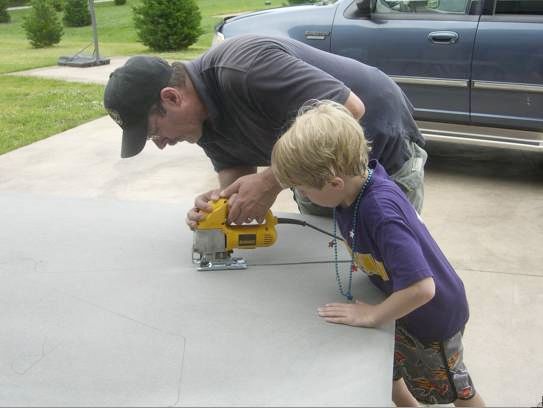
First panel cut, with the help of my youngest
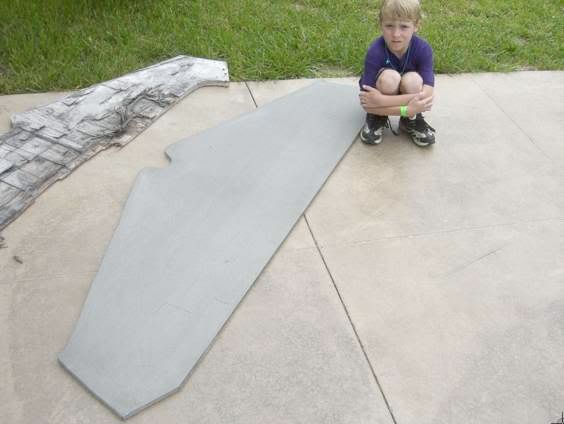
All three cut and ready for glueing
Here is a pic of the panel that was the victim of the overlap. I cut a small piece to fit the gap.
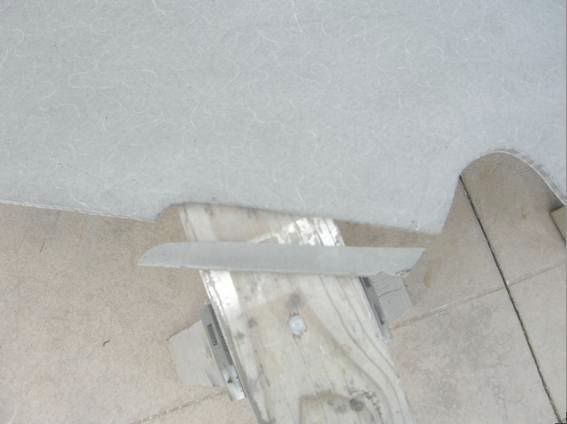
This panel and the fitted piece will be sandwiched between the other B-26 panel and a panel of B-20. If you havn't figured it out yet that will give me 2" for the structural core of the new transom as opposed to the 1 1/4" from the factory ply panel.
Now it's time for the glueing. I chose to use PL Premium Construction adhesive due to it's lower cost as compared to 3M 5200 Fast Cure. I had found it was being used, by wooden boat builders on another forum, with excellent results.
3M 5200 was $11.45/10oz tube
PL Premium was $3.39/10oz tube.
They are both polyurethane adhesives with virtually identical specifications(see the attachments at the end of the post).
Advanced plastics only had 7 tubes of 3M and I would have to order by the case for any more. Lowes has PL on the shelf and I can buy it buy the tube or case; 1/4 the cost to boot.
I started by wiping down all the panels of coosa with a surgical towel to ensure a clean dry surface.
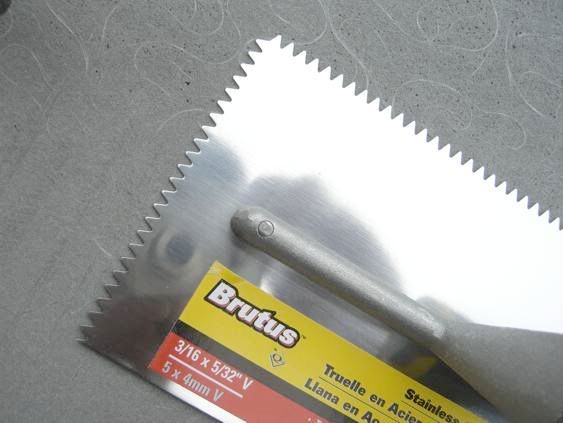
I decided that troweling the adhesive would be the most efficient means of getting it uniform. I used a standard notched trowel I purchased from Lowes.
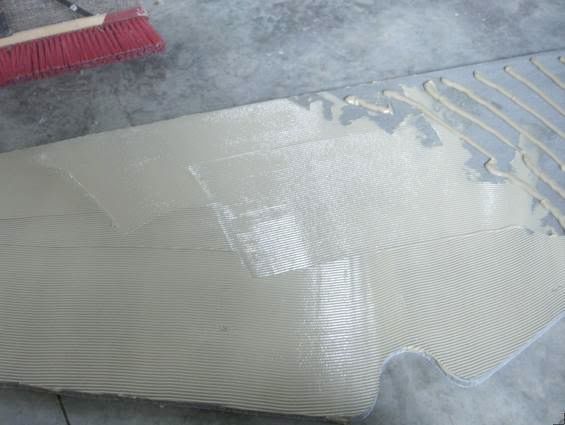
I applied the PL with a caulk gun and began troweling
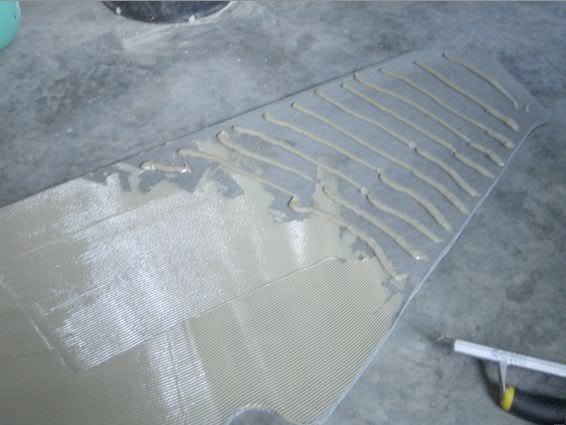
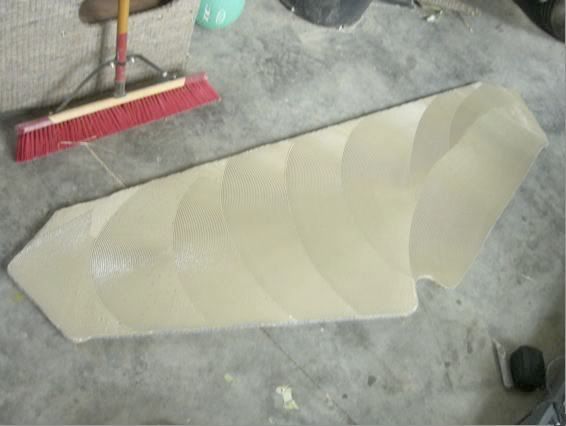
It took three 10 oz tubes to cover the surface of the panel. I took the second B-26 panel and laid it on top; then glued the fitted piece in.
And then applied the second round of PL and troweled. I used a total of six 10oz tubes for the the two sides.
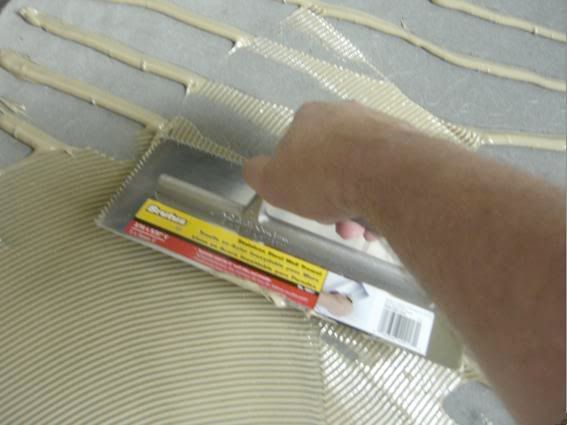
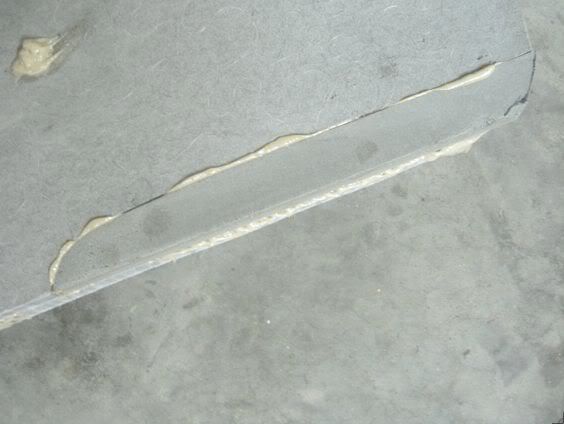
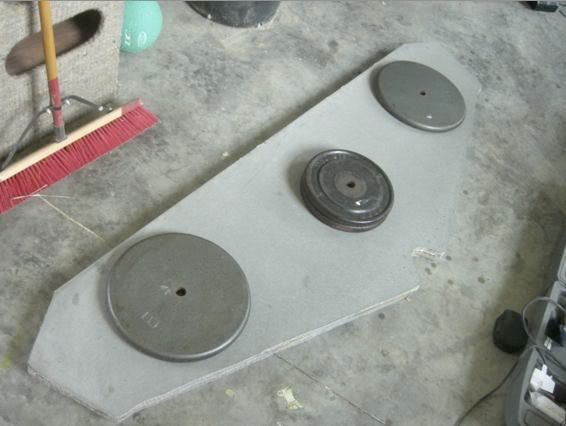
I laid the panel of B-20 on the troweled surface; made sure all the edges were aligned; then placed 200 lbs of weight on top to let it cure over night. I added another 50 lbs after I took this photo.
I was very impressed as to how well this stuff troweled. A notched trowel is the only way to go in my opinion. Clean up was a snap using a rag soaked in acetone.
Tomorrow I will remove the weight and will begin shaping the edges and getting the transom prepped for bedding and glassing in this weekend.
Thanks again for looking!
Hick

I have to give alot of thanks to several members here:175checkmate; teamhart2; jallen355; compulse170; LAallison; wca_tim. thanks guys for all your input
Posted in Uncategorized


